No Products in the Cart


THE MOUNT WITHOUT A HOLDER (Choose your Holder Separately)
NO HOLES, NO DRILLING
EASY INSTALL
CUSTOM DESIGN IN SWEDEN
| This Mount Fits |
Toyota Fortuner Year(s):16-24 |
| SKU | 655179 |
| Barcode # | 7320286551793 |
| Brand | ClicOn |
| Shipping Weight | 0.1000kg |
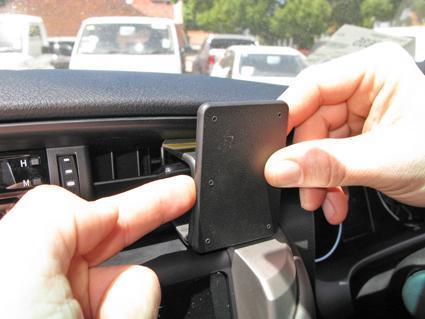
Below you will find the installation instructions for the Centre Mount (SKU:655179), you can click on the images to open a larger version in a new tab
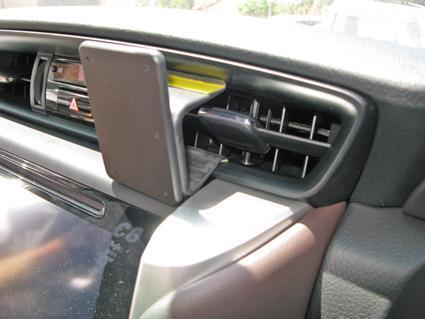
1. Use the enclosed alcohol pad to clean the area where the ClicOn is to be installed. Remove the adhesive tape covers on the ClicOn. Insert the lower angled edge of the ClicOn into the gap on the lower inside of the air vent. Make sure the right side of the ClicOn aligns with the gap next to the padded part of the center console, according to the picture.
2. Slide the ClicOn rightward until it is centered on top of the padded side of the center console. Move the ClicOn forward/upward, at the same time flex the upper angled edge of the ClicOn downward.

3. Insert the angled upper edge of the ClicOn into the gap on the upper inside of the air vent. Make sure the adhesive tape fastens properly.
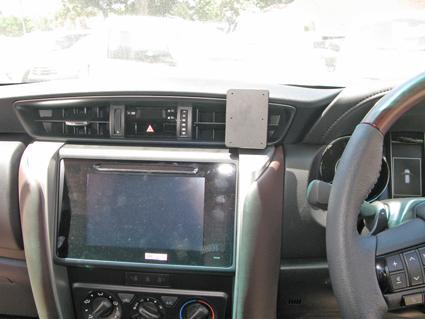
4. The ClicOn is in place.


